
How to Make a Whiteboard Table
Whiteboard tables are a great tool for collaboration. A collaborative environment gets you to better results faster. By promoting cooperation, you are ensuring seamless and effective work flows. Take for example a school setting. Student collaboration works better when everyone can contribute with an all-inclusive collaborative tool. The chalkboard is one example of such tools. Since everyone has equal access to it, ideas grow faster and better results are achieved because more brains are working.

The benefits of whiteboard tables spans over a variety of applications. Imagine being in a brainstorming meeting happening in a conference room. Twenty or so people sitting around a conference table. Listening to a presenter that is writing on a sketchpad. How boring. People wouldn't want to contribute just to get out of there sooner. Now imagine a different scenario; one where the conference table is whiteboard. Staff meetings have now been made more interactive. We have now opened up a new channel for collaboration. Ideas flow more easily when everyone can contribute at the same time, without pressure. The portability is what really makes this project stand out. The table we will use is height-adjustable. Perfect for standing, leaning or sitting. We have increased mobility to this project by using a small table. Let's get down to it with a step-by-step building process.
Step 1) Source the Supplies Needed
These are the basic supplies you will need to build your own whiteboard table:
- Dry erase paint
- Paint primer
- Paint tray
- Painters tape
- Paint rollers
- Stir stick
- Table top
- Table legs or table base
If you have a table already put together, skip step 2. If not, once you have acquired the recommended supplies, move on to step 2.
Step 2) Build the Table

I started with a 24 in. x 24 in. square table top made of plywood and laminate. The top is easy to work with because of its compact size. Some things to know when choosing your surface:
- Is your table top a true wood surface? be sure to put a coating of sanding sealer on before applying the paint.
- If you are using a non-latex coated surface, you will need to use a primer before using the dry erase paint.
- If the surface is damaged (scratches, nicks and dents for example) priming is recommended to achieve the smoothest possible surface.
Prepare your table top by cleaning the surface. Use wood cleaners if it's a true wood top. If not, wipe down with a damp cloth and let air dry.
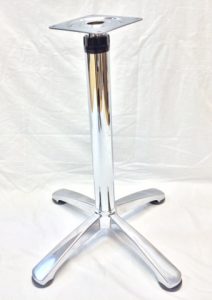
I chose to use a height adjustable pedestal base instead of table legs. This way, you can adjust the height for a multitude of applications. Imagine building a table that can be adjusted from comfortable seating position, to counter height, to bar top or standing position. Making this table height-adjustable has elongated its life and usefulness.
Step 3) Protect Yourself & Surroundings
Always wear proper painters gear when working with paint. I recommend wearing protective eye-wear, a painter's jumpsuit, and gloves. Protect your work space by covering the floor with a tarp. Use painters tape to mask surfaces and edges you don't want painted. Proper ventilation is necessary when working with any paint. It is a harmful chemical if exposed to the odor for long periods of time. Ideally, you would want to paint your table outside. Working indoors? Open windows and doors to ventilate the area and aid in curing and drying. You don't have to use a fan. Avoid pointing it directly at the surface if the fan is necessary to properly ventilate the room. Don't forget to use sufficient lighting when working with paint.
Step 4) Sanding/Priming
For best results, the surface should be as smooth as possible. This means if you have an old table with imperfections, you need to even the surface by sanding or filling cracks before painting. We used IdeaPaint for our project. IdeaPaint's signature product is a high-performing dry erase paint that transforms virtually ANY smooth surface into an erasable canvas, giving people the space they need to fully explore their big ideas. You can take this project and apply it to a wall, or door. You are only limited by your imagination. We used a pre-made laminate table top, so no sanding was needed. Be sure to clean your surface well before applying your dry erase paint. Wipe the surface down with a clean, damp or dry cloth to prevent debris and dust from getting caught in the surface during application. Priming is recommended when coating a non-latex surface, repairing a surface, or changing the color of the surface. After applying a primer, let dry for 24 hours, then sand smooth to remove debris that may have gathered.
Step 5) Paint
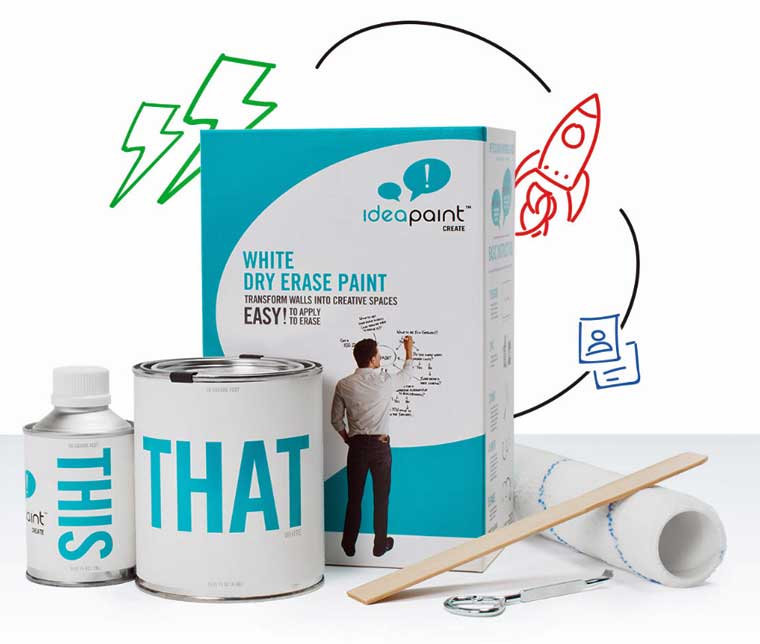 There are different options for dry erase paint, so read your product instructions carefully. We used IdeaPaint because it comes in an (almost) all-included kit called "˜Create White'. This kit included the paint mix, one stir stick, a roller designed for its application, and simple-to-follow instructions. The only tools you will need are a roller frame and paint tray. Prep your surface by using painters tape to cover edges. Apply first coat of dry erase paint. Wait 3-5 minutes, then apply second coat. Important note: after application be sure to remove tape while paint is still wet. This will prevent you from pulling chunks of paint off with the tape.
Step 6) Let Cure
After letting the whiteboard table cure for the recommended time (IdeaPaint says 4 days), it's safe to use any standard dry erase marker on the new surface. Test the erasability of your marker of choice in a small area before use on the entire table surface. Have fun with it! Now that you have your very own whiteboard table, try other things. Create a whiteboard door, or whiteboard phone case. The possibilities are plenty!